Configuring XMod Modules (XMod 4)
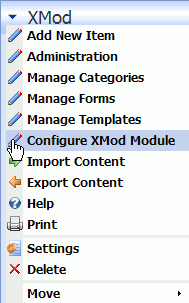 XMod provides a large number of options for customizing how it operates. Each module instance can be configured separately, enabling you even greater flexibility. XMod module instances are configured by selecting Configure XMod Module from the module's Actions menu.
The purpose of this help topic is to familiarize you with the various settings and features you'll encounter when using the Configure XMod Module page. It's broken into 4 sections, each represented by a tab: Required Settings, Data Settings, Display Settings and Security Settings
Shortcuts:
Required Settings Tab
Data Settings Tab
Display Settings Tab
Security Settings Tab
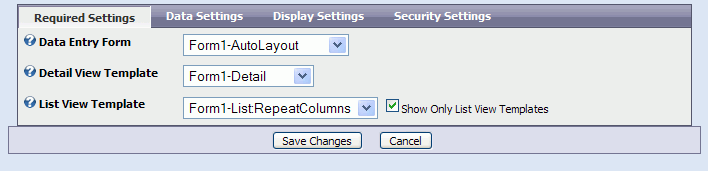
Data Entry Form
Every module instance must be assigned a data-entry form. This tells XMod where to get the data it displays. If you haven't yet created a data-entry form, see Managing Forms.
Detail View Template
Select the template used for displaying the detailed view of a record. When a user clicks a link from a list of records to see a single record, XMod will use this template for displaying that record. Typically the list view will display a few summary values from the record and this detail template will display more values. Of course, if your list view will not be providing the user any way to see the details of a record, you can safely ignore this field. However, you'll still need to specify some template as it is a required field.
List View Template
Select the template used for displaying a list of records. "List View" is used in a generic sense here. A list view template can be a List or a Grid type template. It's primary intent is to allow the user to search or otherwise browse through a collection of records. If you have a lot of templates, you can tick the Show Only List View Templates check box to hide the detail templates.
Back to Top

On this tab, you can configure some of the data features for the module, such as filtering, limiting the number of records returned, the number of records to list per page, the user's ability to search, and integration with DNN's search facilities.
Choose Category
Optionally, you can choose to filter the displayed results to only those records which are assigned to a certain category. Categories are created by choosing Manage Categories from the module's Actions menu.
Page Size
Determines how many records will be displayed per page. The default value is 10
Content Scheduling
XMod allows you to schedule when content is displayed and removed from view using the <displaydate> and <expirydate> form tags. You can disable this feature for the module by checking the boxes. New to XMod 4, you can selectively choose to ignore the display date, the expiration date, both, or none.
Result Set Size
Enter the maximum number of records to retrieve. Leave this field blank to retrieve all records.
Filtering
XMod enables you to restrict the kinds of records displayed to the user. You can filter based on the value entered in a form. You can pass a value via the URL and match that up with a value in the form. You can also show only records that have been added by the user current user.
-
Filter On Form Value: XMod will look for the specified value in the selected form field. HINT: XMod Constants like {XMOD_UserId} may be used in the Value field.
-
Filter On URL Value: XMod will take the value of the named parameter and look for it in the selected form field.
-
Show Only Current User's Record: If checked, XMod will only show records that have been added by the current user. NOTE: the user must be logged-in. If this box is unchecked, XMod will display records added by all users.
User Searching
In order to allow users to search you must check the Allow Users to Search check box. Next you must select at least one form field from the Search Fields list box. Finally, you can specify the text that will be used for the caption for the text box into which the user enters the search phrase and the text of the link the user clicks to initiate the search.
Back to Top
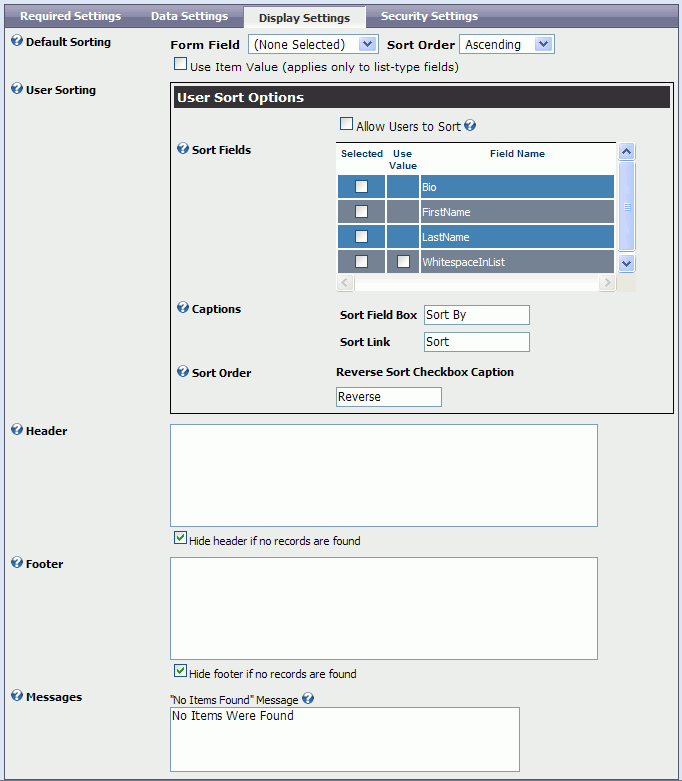
The Display Settings Tab is where you configure some of the characteristics governing the module's sorting, header and footer text, as well as messages displayed to the web site visitor.
Default Sorting
This provides default sorting for the module - the initial sort field and sort order of the data.
User Sorting
In order to allow users to sort you must check the Allow Users to Sort check box. Next you must select at least one form field from the Sort Fields list box. Additionally, you can specify the text that will be used for the caption for the drop-down list box used to select a sort field and the text of the link the user clicks to initiate the sort. Finally, you can also specify the text used for the checkbox the user ticks to indicate records should be sorted in descending order.
Header/Footer
Prior to XMod 4, only Lists provided the possibility of displaying content before and after the list of records. With XMod 4, however, Grids also provide this capability. The grid's header/footer is separate from the headers and footers at the top and bottom of each column. In these areas you can include text, HTML, and a subset of non-data-related XMod tags (like <xmod:addbutton>) as in the screen shot above.
Messages
Allows you to customize the XMod messages displayed by this module.
Back to Top
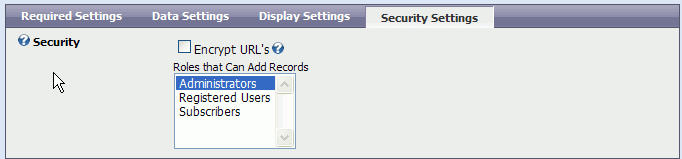
Security
-
Encrypt URL's: If checked, XMod will encrypt the data it sends in the URL when a user clicks a link to see a record's details. This helps prevent users from viewing data they don't have access to by editing parameters in the URL.
-
Roles That Can Add Records: New to XMod 4, you can now specify which roles will be allowed to add records through via the XMod module. In previous versions, you had to grant a user edit permissions to the module or use the XMod FormView module. Now, simply select one or more roles and add an <xmod:addbutton> tag to your template (or in the header or footer section on the Display Tab).
When you've finished configuring the module, click Save Changes to save your settings and return or Cancel to abandon your changes and return.
Back to Top